In this tutorial you will be learning the intricacies of real-world photography touchups and manipulation. Follow photographer Mitchell Kutney as he shows you step-by-step his workflow of manipulating close-up portraits…
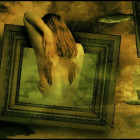
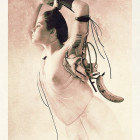
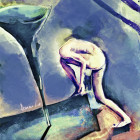
Alrighty, this is what we have to work with – a high resolution (resized for tutorial) photograph. This tutorial will be conducted with Photoshop CS, that will touch on the polygonal lasso tool, feathering, color adjustment, contrast adjustment, level adjustment, clone stamp tool, hue-saturation adjustment, as well as sharpening.

1) First step, grab the polygonal lasso tool.

2) We want to remove any unwanted color (incase you do not want a B&W finish) — so lets get rid of these unwanted greens.

3) Click and move the mouse around the areas you want to get rid of. (You can hold shift after you have selected one area to grab another section.)

4) Then, right click to feather the selection area, this will make it so the human eye cannot tell where the adjustment begins and ends. This is a necessity when working with photographs.

5) Click, Adjustments at the top of the screen, then Color Balance, then lower the greens, by increasing the Magenta color.


6) Good job!

7) Now because of lowzy lighting techniques, we need to adjust the other parts of this model’s body that did not get proper lighting. So once again, lasso the parts that you want to increase. In this case, we will be highlighting everything but the very center of the model’s face.

8) Click adjustments, then Brightness/Contrast– and adjust till it is equal brightness/contrast across the whole body.

9) Now we have to fix the hair because it blends too much in with the background, so open up Adjustments and select levels, and move the middle or the far right white arrows left to increase the lighting.


10) Then click on the clone tool, to clean up the various unwanted blemishes (Sorry people, as much as anyone might think, no one is perfect at all times of the day).

11) Hold Alt at the nearest point near the blemish, click, release, then click with the clone tool while using a blurred brush over the blemish to remove. Repeat.

12) Than either hold ctrl + U, or select Adjustments / Hue/Saturation — and remove the color by sliding the Saturation bar to -100.


13) Lastly, select Filter, then Sharpen/Sharpen for the final touches to icrease clarity.

14) Add a border if you wish, and voila, you are done.

© Mitchell Kutney A.K.A Fmyth – http://forgotten-myth.deviantart.com http://www.kutney.net