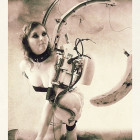
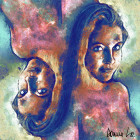
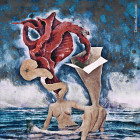
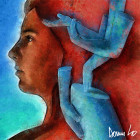
This tutorial will only cover part of the completed tempus fugit. It will show only one of the faces. To show both would make this tutorial too long and complicated.

I begin always by converting the image I am going to be working on into grayscale (image/mode/grayscale). Then I increase the working space to 16 million colors (image/mode/rgb).

Using the image in black and white is simply a preference. I find it easier to control thingssuch as brightness/contrast and shadows. As well as I do’t have muddy colors in the end.
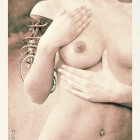
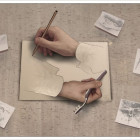
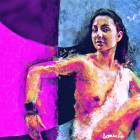
Using airbrush I eliminate the mouth which will be replaced later on. Match the airbrush color to the skin as best as you can. It doesn’t have to be perfect. I use a tablet but a mouse works just fine.

This step might seem pointless but it works into the next step and makes it easier.
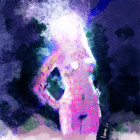
Duplicate the layer and go to the layers palette. Set the top layer to multiply. This deependsthe color and especiallythe shadows. Re-merge the layers.

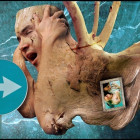
Using airbrush again, blacken out the background. Being careful around the edges of the goggles and the face. Also use the burn tool to deepen the shadows more. And use brightness/contrast to bring out lighter areas. I had mine set at 10 brightness and 10 contrast.

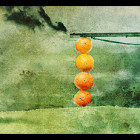
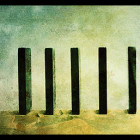
The texture was much larger thanthe image, but I left it larger so that I could have roomto move it about till I liked the placement. Since it was a grunge texture, scale was not an issue.
I now apply my first texture, a grunge type one. Go to the layers palette and set the texture on multiply. Move the texture around the image until you like how it looks. Erase away any texture not wanted. As you can see the texture itself colored the image nicely. It would look quite different if the image was still color, but Isuggest experimenting inn both.

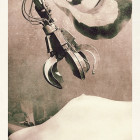
Back to airbrushing. Darken out the eye area so that it appears in total shadow. Keep the size small, I had mine at about 6, opacity 100%. Then using the burning tool once more to deepen shadows and the glass area of the goggles.

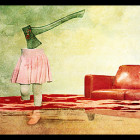
To get the shape of the mouth that I wanted I used a stock photo of old bills by pdtnc. I used an area with the appropriate folds to get the pouty mouth shape. Apply mouth piece and setlayer palette to multiply. Carefully erase any unwanted areas, gradually lowering the eraser’s opacity to blend the two images. Then use the burn tool to deepen the shadows surrounding the mouth. Using airbrush to touch up areas and shape the mouth more.

I added a small piece of the grunge texture here to the left hand side of the face to balancethe texturing.
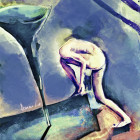
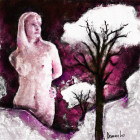
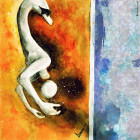
Next I apply my cracked/tor typeof texture on the forehead and the cheek. The texture layeris applied with layer palette on multiply. Then carefully erasing and blending with the eraser, gradually lowering the opacity. Using the burn tool again to deepen the shadows and edges of new areas.

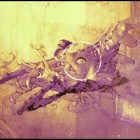
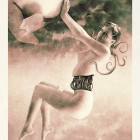
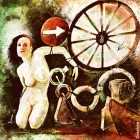
I took a stock photo of a clock face and brought it down to the appropriate size, then convertedit to grayscale. I applied the greyscaled clock to the one goggle piece with layer palette set to overlay. Carefully erase the edges and blend. I then useda the pinch filter (found under filter/distort) at about 10%. This gave the clock a more curved look. Again back to the burn tool, running it around theedges of the clock, I always keep my burn tool set to no morethan 2%. This is now the time I would do any touch ups using air brush. And last but not least add the border of your choice and signature.
About the author:
I was born and raised in central Canada in 1962, and I live there still with my husband and our teenage son. Art has always played a part in my life, for the last 7 years or so I have focused on digital art, tapestry and painting in acrylics. I am co-owner of Groundfrost Illustration and Design which began in October 2004. Some of our clients include the Black Eyed Peas, God Forbid and The Killers. My digital art tools are Paintshop Pro 9, Poser 5, a Kodak Easy Share camera and a Wacom tablet. Poser 5 and my digital camera are still new tools to me, I’m learning as I go. I can’t imagine my life without art in it, its a part of me.
? Shelley Bergen aka Nebu | http://nebu.deviantart.com
Published on ArtCone with permission