In this tutorial I am going to show you a quick way to do embroidery looking text, this technique can also be used for borders and logos to make patches.
The first thing that we have to do for this tutorial is create a Paint bucket pattern fill for later on.
Make a new canvas 2 pixels x 5 pixels.

Results:

Go to Select>All, then Edit>Define Pattern.. Give your pattern a name and click OK.

Main Tutorial:
Next create a new canvas. (Size depends on you, different sizes will have different settings though the tutorial).
I created a quick background layer using a light grey then Filter>Texture>Texturizer with canvas option, and my Text layer.


Then right clicking on the text layer select Rasterize type. This option will allow us to edit and use filters on the text.

With the Text layer still selected go to Filter>Texture>Texturizer

Give it a Sandstone texture with slight scaling and relief.

Next Duplicate your Text layer and CTL+Click on the text layer copy to make a selection (you should see marching-ants around your text now) and go to Select>Modify>Contract.

The Size of the Contract will depend on your Font/Document size. Add just a slight Contract.

It should look similar to this.

Now go to Select>Inverse to inverse your selection and click Delete.

After that select your layer options (small f on the bottom of your layer palette) and choose Bevel and Emboss.

Make your Depth and Size a low percent and a higher Soften effect.

Result:

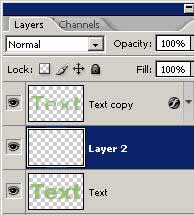
Now back to your original text layer, CTL+Click on it so that its selected, then create a new layer.
On the new layer go to Edit>Stroke

Give your selection a Slight outside stroke
The stroke size will also depend on your Font/Document Size.

After you have your stroke, go to Windows>Channels.
This is where the Pattern fill in the beginning of the tutorial comes in.
Create a new channel layer (alpha 1). and choose your Fill Paint Bucket, with a Pattern fill option, Select your Pattern selection that we created earlier. Fill the new Channel layer with this pattern.

Then CTL+Click on the Alpha Channel to select it, and Switch back to your Layers Palette and click on the layer we added the stroke to, and Press Delete
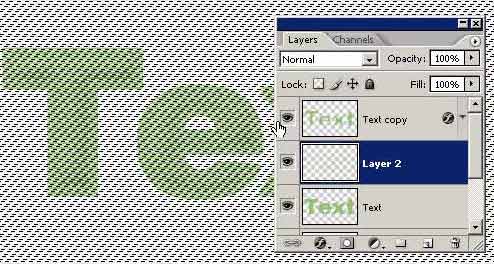
Your results should look similar like this.

*Notes:
For thinner or thicker lines create a different size Fill Pattern.
For Vertical Lines Rotate your Fill Pattern then Define Pattern. And Create a 2nd layer Stroke with a new Alpha Channel.
For Logos/Borders Make sure each part of the logo is a different layer

I hope you enjoyed the tutorial. If you did I’d like to here your comment .
If you have any questions feel free to write them on the forum at ArtCone
Tutorial written by Jason Poston – Spllogics All rights reserved.